First post in the VM Essentials Install & Cluster module. Foundations is done — A1.8 closed it. Now we build.
The appliance you install is the appliance you’d install for Enterprise
Worth saying before anything else, because it saves confusion: HPE Morpheus is a single product image for any licensing edition. The manager you install for HPE Morpheus VM Essentials Software (VM Essentials, VME) is the same appliance covered in E1.4 — same package, same services, same paths, same morpheus.rb. The licence decides which tier you’re running, not the installer.
So this post doesn’t repeat E1.4’s install mechanics. It covers what’s specific to standing up a VME manager: the sequence, the settings to fix before anyone else logs in, and the backup regime — which has a constraint sharp enough that it belongs on day one, not day ninety.
One scoping note. Deployment, installation and initialisation are not in the v9.0.1 user manual. The documentation points to a separate HPE Morpheus VM Essentials Deployment Guide, which isn’t in this series’ reference base. What follows is grounded in the appliance requirements and install procedure documented for the shared product image, plus the VME manual’s own configuration and backup sections. Anything specific to the VME deployment path is marked against the HPE guide.
Sizing, briefly
From A1.6, and unchanged here:
| Manager appliance | |
|---|---|
| Memory | 16 GB recommended; 8 GB minimum with 4 GB+ swap |
| Storage | 200 GB as a starting figure — under 10 GB at install, grows with images, backups, logs |
| CPU | 4-core, 1.4 GHz or better, 64-bit |
| Network | TCP 443 from users; reachable and resolvable by every host and workload |
Supported appliance operating systems include Ubuntu 20.04/22.04/24.04, RHEL 8/9/10, Rocky 8/9, Debian 11/12, SLES 15, Oracle Linux 8/9 and Amazon Linux 2.
Don’t nest the manager inside the cluster it manages. Obvious once stated, easy to do in a lab, and it turns a cluster problem into a cluster-and-management problem.
The install
# 1. Pre-flight — the step that decides whether the rest is uneventful
free -g && df -h / && nproc
timedatectl show -p NTPSynchronized        # NTP is a requirement, not a nicety
sudo apt-get update -qq                    # or dnf — base repos must be reachable
                                           # RHEL 8 also needs codeready enabled

# 2. Install the appliance package
sha256sum morpheus-appliance-$version.deb
sudo dpkg -i morpheus-appliance_$version_amd64.deb    # or rpm -ihv on RHEL-family

# 3. Set the appliance URL BEFORE the first reconfigure
sudo vi /etc/morpheus/morpheus.rb
#    appliance_url defaults to the machine hostname: https://your_machine_name

# 4. Build it
sudo morpheus-ctl reconfigure
sudo morpheus-ctl status
Step 3 is the one to get right first time. The Appliance URL is what every HVM host agent and every provisioned workload uses to reach the manager on 443. Changing it later is easy; changing it after fifty workloads can’t resolve it is not.
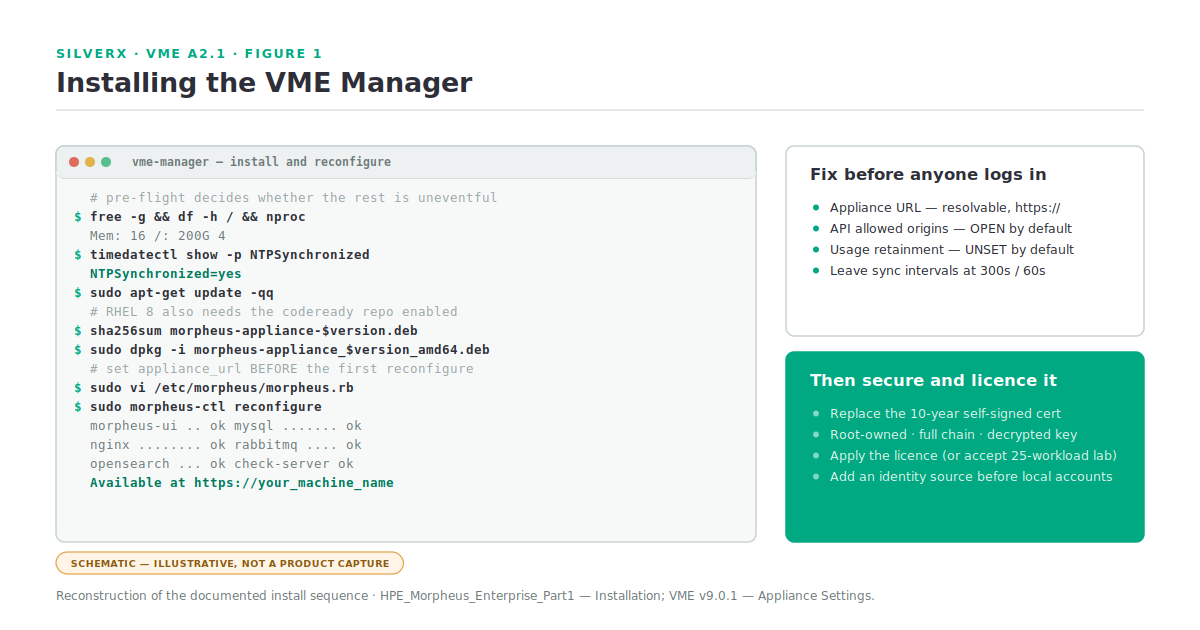
What to fix before anyone else logs in
The appliance comes up usable and wrong in several small ways. From A1.3, the settings that deserve a decision rather than a default:
Appliance URL — set, resolvable, https://. Per-cloud overrides available under Edit Cloud > Advanced Options for split DNS.
Internal Appliance URL (PXE) — needed if you’ll do bare-metal provisioning; the appliance must be routable with minimal NAT masquerading.
API Allowed Origins — all origins are allowed by default. If anyone will build tooling against the API, set the allowlist now. Two minutes, easy to forget forever.
Usage Retainment — not set by default, meaning metered costing records accumulate indefinitely. Set it to your actual reporting window.
Sync intervals — Cloud 300s, Cluster 60s. Leave them. Lowering them on a busy appliance trades a cosmetic delay for a real performance problem.
The SSL certificate. The appliance generates a 10-year self-signed certificate. Replace it before anyone uses the platform:
# /etc/morpheus/morpheus.rb
nginx['ssl_certificate'] = '/path/to/certificate.pem'
nginx['ssl_server_key']  = '/path/to/server.key'
sudo morpheus-ctl reconfigure
sudo morpheus-ctl restart nginxBoth files root-owned and root-readable only, the full signing chain included in the certificate file if it’s signed by an intermediate, and the key decrypted. Those three constraints cause most of the failures at this step.
The licence. Without one you get the lab licence: time-unlimited, 25 managed and discovered workloads or 6 sockets. Apply the real one under Administration > Settings > License — the same tab that later elevates you to HPE Morpheus Enterprise Software.
An identity source, before you create local accounts you’ll have to audit later (E1.7).
Backups — and the constraint that shapes them
This is the part I’d move to day one, because of one sentence in the documentation.
In the event of a total system failure, recovery requires you to provision a new, freshly installed VME Manager. You cannot perform the recovery on a partially configured or corrupted appliance.
Read that carefully. There is no repair path. A corrupted manager is not fixed in place — it’s replaced, and the restore goes onto a clean install. Which means:
- Your backup is the whole recovery plan. There’s no fallback of “we’ll repair it”.
- You need a documented rebuild, because recovery starts with a fresh appliance install. If that takes you two days to work out under pressure, your RTO is two days plus the restore.
- Test the restore onto a genuinely fresh appliance. A restore tested onto the original machine hasn’t tested the documented path.
Configure it under Administration > Settings > Backups: default backup bucket, schedule, retention count. Master Tenant users with the permission additionally get appliance backup — that’s the one that matters here, distinct from workload backups.
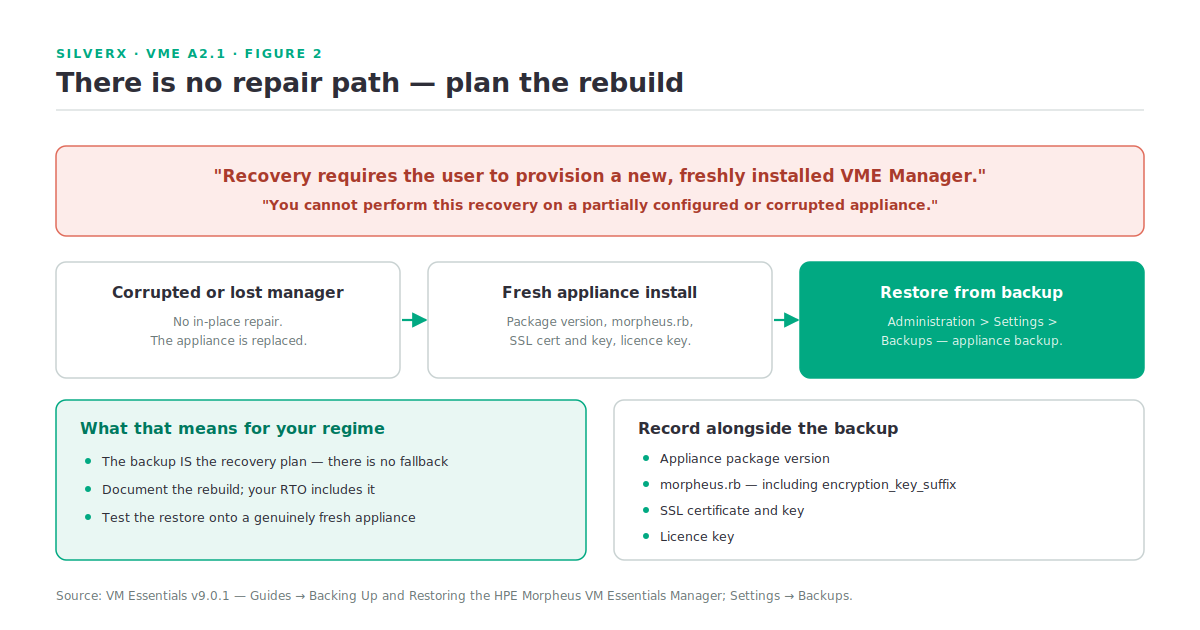
While you’re there, record what a rebuild needs: the appliance package version, morpheus.rb contents (including **encryption_key_suffix** — decide and document it at build time, not during a restore), the SSL certificate and key, and the licence key.
Then the first cluster
With the manager up, licensed, secured and backed up, the next step is hosts. From A1.6, each prospective HVM host needs Ubuntu 24.04, virtualisation enabled in BIOS, static IPs, DNS resolution of the manager, raw unRAIDed data disks, outbound internet for package installation, and the cluster ports open.
HVM clusters live in a Private Cloud-type Cloud in the data model, so create one to house them (A1.2).
That’s A2.2’s subject, and it’s where the interesting failures live.
Gotchas and caveats
**Set appliance_url before the first reconfigure.**
**NTP and repositories are the two most common reconfigure failures.** The error names a service, not the actual cause.
Don’t alter the default paths. /opt/morpheus, /var/log/morpheus, /etc/morpheus/morpheus.rb — changing them is unsupported and may break functionality.
Externalised services ignore service configuration. For external MySQL, OpenSearch or RabbitMQ, only the connection settings in morpheus.rb apply.
200 GB is a starting figure. Monitor it — the documentation is explicit that adequate space is the customer’s responsibility.
The manager is a single point of management. For anything production, read E1.4’s distributed and HA topologies before committing to all-in-one. The tiers are declared rather than baked, so an all-in-one appliance can become the application tier of an HA build later — but plan the database tier properly from the start.
Deployment specifics are The VME Deployment Guide is the authority on the VME installation and initialisation path; check it against anything here that concerns the install media or first-boot flow.
Key takeaways
- Same product image as Morpheus Enterprise — the install is E1.4’s install, the licence decides the tier.
- 16 GB RAM, 200 GB storage to start; don’t nest the manager in its own cluster.
- Set **
appliance_urlbefore the first reconfigure; fix API allowed origins and usage retainment**, which default to open and unset. - Replace the 10-year self-signed certificate — root-owned, full chain, decrypted key.
- Recovery requires a fresh appliance. There is no repair path, so the backup plus a documented rebuild is your recovery plan — and the restore should be tested onto a clean install.
- Document **
encryption_key_suffix**, the package version and the licence key alongside the backup.
What’s next
Next in this track: A2.2 — Preparing HVM Hosts. The host-side work VM Essentials expects you to have done — OS build, netplan bonds and VLANs, MTU, storage presentation, and the pre-flight that decides whether your first cluster build is an afternoon or a fortnight.
Sources: HPE Morpheus VM Essentials Software Documentation v9.0.1